CSS, or Cascading Style Sheets, is a stylesheet language used to describe the look and formatting of a document written in HTML. It allows developers to separate the presentation of a website from its structure and content, making it easier to maintain and update. With CSS, you can control the layout, colors, fonts, and other visual elements of a webpage.
In this tutorial, we will cover the basics of CSS, including syntax, selectors, and cascading. You will learn how to style text, add background colors, and create simple layouts. By the end of this tutorial, you will have a solid understanding of how CSS works and be able to create basic styles for your own web pages.
Let’s get started!
Before we dive into styling our webpage, let’s take a look at the basic syntax of CSS. A CSS rule is made up of a selector and a declaration block. The selector targets a specific HTML element on the page, and the declaration block defines the styles to be applied to that element.
Here’s an example:
selector {
  property: value;
}
In this example, the selector targets an HTML element, and the declaration block contains a property (such as color or font-size) and a value (such as red or 16px).
CSS selectors are used to select HTML elements on the page and apply styles to them. There are several different types of selectors, including element, class, and id selectors.
<p> elements on the page..highlight.#header.CSS is called “cascading” because if multiple styles are applied to the same element, the styles defined last will take precedence. This allows you to define a general style for all elements of a certain type, and then override that style for specific elements as needed.
For example, you could define a style for all <p> elements to have a font size of 16px, and then create a class selector with a font size of 24px to apply to specific <p> elements. The class selector would take precedence over the general <p> style.
To use your CSS styles on a webpage, you need to reference the stylesheet in the HTML document. This is typically done in the <head> section of the HTML document using a <link> element.
Here’s an example:
<head>
  <link rel="stylesheet" type="text/css" href="style.css">
</head>
In this example, the rel attribute specifies the relationship between the HTML document and the stylesheet, which is “stylesheet”. The type attribute specifies the type of the file, which is “text/css”. And the href attribute specifies the location of the stylesheet file, in this case, a file named “style.css”.
Now, whenever you open this HTML document in a web browser, it will automatically apply the styles defined in the stylesheet to the elements on the page.
Now that you understand the basics of CSS syntax and selectors, let’s start applying some styles to our HTML page.
Here’s a simple example of how to change the text color of all <p> elements to red:
p {
  color: red;
}
And here’s an example of how to create a class selector to make text bold:
.bold-text {
  font-weight: bold;
}
In your HTML, you would apply the class to a specific element like this:
<p>This is bold text.</p>
Now remember to also reference your stylesheet in the <head> tag otherwise your HTML won’t know there is any styling available.
Here’s how your code should look:
Your HTML page:
<!DOCTYPE html>
<html>
  <head>
    <link rel="stylesheet" type="text/css" href="style.css">
    <title>CSS Introduction Tutorial</title>
  </head>
  <body>
   <p>This is bold text.</p>
  </body>
</html>
Now, whenever you open this HTML document in a web browser, it will automatically apply the styles defined in the stylesheet to the elements on the page.
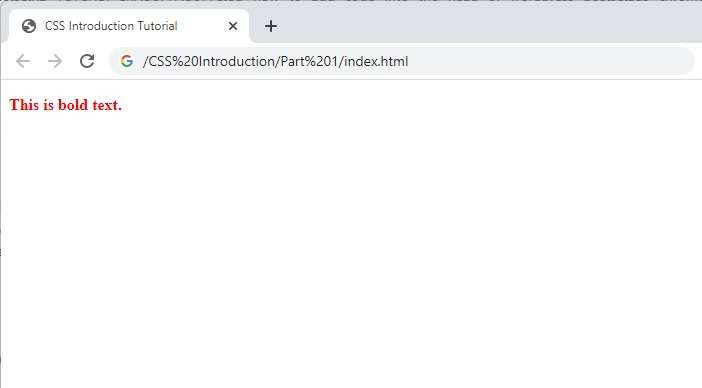
Your finished product should look like this:

That’s it! You now have a basic understanding of CSS, including syntax, selectors, cascading, and referencing the stylesheet in HTML. Start experimenting with different styles and see what you can create. Happy styling!
You must be logged in to post a comment.