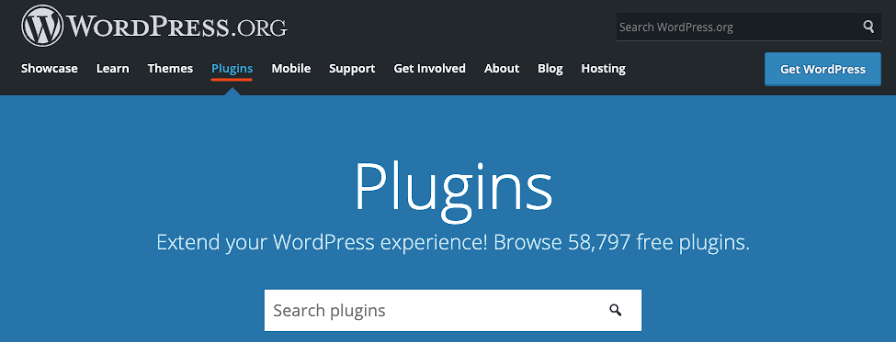
Creating an advanced WordPress plugin can seem like a daunting task, but with the right resources and guidance, it’s a achievable goal. By building a more advanced plugin, you can add complex functionality to your WordPress site and take it to the next level.
In this guide, we’ll walk you through the steps of creating a more advanced WordPress plugin, including:
Choosing a Unique Name
First, you’ll need to choose a unique name for your plugin that hasn’t been taken by another plugin in the WordPress repository.
Setting up the Plugin Folder
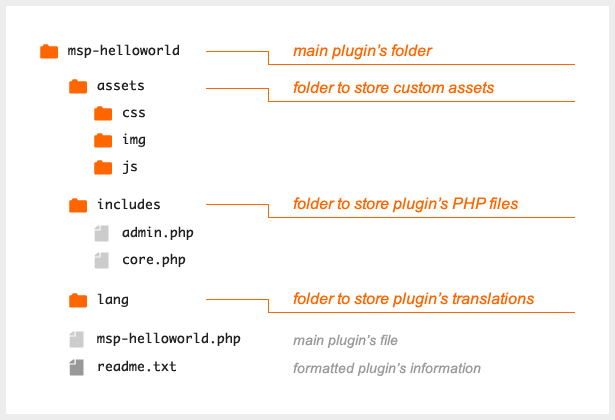
Next, you’ll create a folder for your plugin and add the plugin header information to the main plugin file.
Setting up the plugin folder is the first step in creating an advanced WordPress plugin. Here’s how to do it:
- Create a New Folder: Navigate to the “wp-content/plugins” directory in your WordPress installation and create a new folder for your plugin. Give it a descriptive name that reflects the purpose of your plugin, for example “advanced-plugin”.
- Create a Main Plugin File: Within the plugin folder, create a new PHP file that will serve as the main plugin file. This file should have the same name as your plugin folder, for example “advanced-plugin.php”.
- Add the Plugin Header Information: In the main plugin file, you’ll need to add the plugin header information. This information will tell WordPress what your plugin does and how it should be displayed in the plugin repository. Here’s an example of the plugin header information:
<?php
/*
Plugin Name: Advanced Plugin
Plugin URI: https://example.com/advanced-plugin
Description: This is a more advanced plugin that adds additional functionality to your WordPress site.
Version: 1.0
Author: John Doe
Author URI: https://example.com
*/
- Define the Main Plugin Function: Below the plugin header information, you’ll need to define the main plugin function. This function will run when your plugin is activated and will contain all of your plugin’s code. Here’s an example of a basic plugin function:
function advanced_plugin_function() {
    // Your plugin code here
}
- Register the Plugin Function: Finally, you’ll need to register the plugin function so that it runs when your plugin is activated. You can do this using the
register_activation_hook() function. Here’s an example:
register_activation_hook( __FILE__, 'advanced_plugin_function' );
By following these steps, you’ll have created the foundation for your advanced WordPress plugin. From here, you can add additional functionality, such as custom post types, settings pages, and more.
Writing the Main Function
This is where you’ll write the main functionality of your plugin. You can use WordPress actions and filters to extend the functionality of your site.
Writing the main function of your advanced WordPress plugin is where you’ll add the core functionality of your plugin. Here’s how to do it:
- Determine the Functionality: Before you start writing code, take some time to determine what functionality you want your plugin to have. This could be anything from creating custom post types to adding shortcodes, or anything in between.
- Use WordPress Actions and Filters: To add functionality to your plugin, you’ll want to use WordPress actions and filters. Actions allow you to insert code at specific points in the WordPress core, while filters allow you to modify data before it’s displayed on the frontend of your site.
- Code the Functionality: With the desired functionality in mind, you’ll want to write the code that implements that functionality. This could include using WordPress functions, creating custom functions, or even using third-party libraries.
- Test the Functionality: Once you’ve written the code, you’ll want to test it to make sure it works as expected. You can use the WordPress Debugging feature to help you identify any issues that may arise.
- Optimise the Code: Finally, you’ll want to optimise your code to make sure it’s as efficient as possible. This could involve optimizing loops, reducing the number of database queries, or using caching to improve performance.
By following these steps, you’ll have written the main function of your advanced WordPress plugin. Remember to always test your code thoroughly and make sure it’s secure before releasing it to the public
Adding Admin Pages
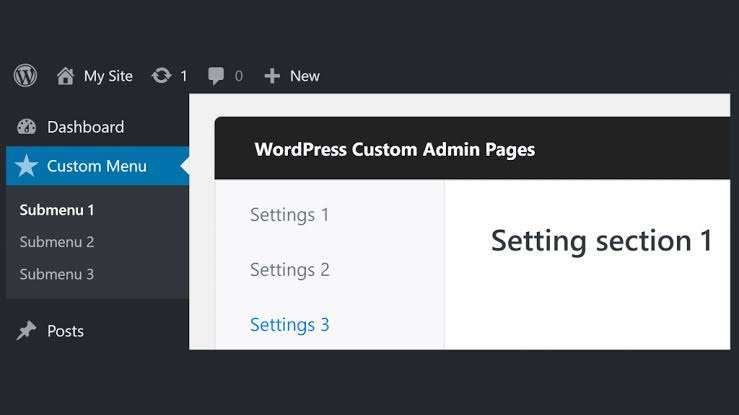
If your plugin requires an administrative interface, you’ll want to add one or more pages to the WordPress dashboard. This is where you’ll configure your plugin’s settings and manage its data.
Adding admin pages to your advanced WordPress plugin is a great way to provide users with a user-friendly interface for managing the plugin’s settings and options. Here’s how to do it:
- Determine the Admin Pages: Before you start writing code, determine what kind of admin pages you want to add to your plugin. This could be a settings page, a custom post type management page, or any other kind of page you need for your plugin.
- Use the WordPress Admin Menu: To add admin pages to your plugin, you’ll want to use the WordPress
add_menu_page() and add_submenu_page() functions. These functions allow you to create top-level and sub-level admin menu items.
- Create the Admin Page Template: Next, you’ll want to create the template for your admin page. This template will contain the HTML, CSS, and JavaScript needed to display the page and its contents.
- Code the Admin Page Functionality: With the template in place, you’ll want to write the code that implements the functionality of your admin page. This could include saving options, processing form submissions, or any other functionality your admin page needs.
- Add Option and Settings Fields: If you want to allow users to change settings or options within your plugin, you’ll want to add option and settings fields to your admin page. You can use the WordPress
settings_fields() and do_settings_sections() functions to do this.
- Test the Admin Pages: Once you’ve finished writing the code for your admin pages, you’ll want to test them to make sure they work as expected. You can use the WordPress Debugging feature to help you identify any issues that may arise.
By following these steps, you’ll have added admin pages to your advanced WordPress plugin. Remember to keep your admin pages user-friendly and easy to navigate, and make sure the code is secure and optimised for performance
Storing Data
You may need to store data, such as plugin settings or custom post types, in the WordPress database. We’ll show you how to use the WordPress database API to create custom tables and manage data.
Storing data is an essential part of any advanced WordPress plugin, as it allows you to persist information and options between page loads. Here’s how to do it:
- Determine the Data to Store: Before you start writing code, determine what kind of data you want to store. This could be plugin settings, custom post type data, or any other type of information you need to persist.
- Choose a Storage Method: There are several methods for storing data in WordPress, including options, custom post types, and custom tables. Choose the method that is best suited for the type of data you want to store.
- Use the WordPress Settings API: If you’re storing plugin settings, you can use the WordPress Settings API to save and retrieve your data. The Settings API provides a simple and secure way to handle options and settings for your plugin.
- Use the WordPress Database: If you’re storing custom post type data, you can use the WordPress database to save and retrieve your data. You can use the
wp_insert_post() and wp_update_post() functions to insert and update custom post type data.
- Use Custom Tables: If you need to store a large amount of data or need more control over your data structure, you can create custom tables in the WordPress database. You can use the
$wpdb object to interact with your custom tables.
- Test the Data Storage: Once you’ve finished writing the code for storing your data, you’ll want to test it to make sure it works as expected. You can use the WordPress Debugging feature to help you identify any issues that may arise.
By following these steps, you’ll have implemented a method for storing data in your advanced WordPress plugin. Remember to choose the storage method that is best suited for your data, and make sure the code is secure and optimised for performance.
Enqueueing Styles and Scripts
To add styling and interactivity to your plugin, you’ll need to enqueue styles and scripts. This will help your plugin integrate seamlessly with your site.
Enqueueing styles and scripts is an important part of any advanced WordPress plugin, as it allows you to add custom CSS and JavaScript to your plugin’s pages. Here’s how to do it:
- Determine the Styles and Scripts: Before you start writing code, determine what styles and scripts you want to enqueue. This could be custom CSS for your plugin’s admin pages, or JavaScript for adding interactivity to your plugin’s pages.
- Use the WordPress
wp_enqueue_style() and wp_enqueue_script() Functions: To enqueue styles and scripts in WordPress, you’ll want to use the wp_enqueue_style() and wp_enqueue_script() functions. These functions allow you to add styles and scripts to your plugin’s pages.
- Specify the Dependencies: When enqueueing styles and scripts, you may want to specify dependencies. For example, you may want to ensure that a script is loaded after jQuery. You can specify dependencies using the
wp_enqueue_style() and wp_enqueue_script() functions.
- Register and Enqueue in the Correct Hook: It’s important to register and enqueue styles and scripts in the correct hook. The most common hook for registering and enqueueing styles and scripts is
wp_enqueue_scripts, which fires on the wp_enqueue_scripts action.
- Test the Styles and Scripts: Once you’ve finished writing the code for enqueueing your styles and scripts, you’ll want to test them to make sure they work as expected. You can use the WordPress Debugging feature to help you identify any issues that may arise.
By following these steps, you’ll have added custom styles and scripts to your advanced WordPress plugin. Remember to keep your styles and scripts organised and well-commented, and make sure the code is optimised for performance.
Testing and Debugging
Before releasing your plugin to the public, you’ll want to thoroughly test it to ensure it works as expected. You may also need to debug any issues that arise.
Testing and debugging are critical steps in the process of creating an advanced WordPress plugin. Here’s how to do it:
- Write Test Cases: Before you start testing your plugin, you’ll want to write test cases that cover the different features and functionality of your plugin. Test cases should be comprehensive and include different scenarios and edge cases.
- Use the WordPress Debugging Feature: WordPress has a built-in debugging feature that allows you to output debug information to the browser. To enable debugging, you’ll want to add the following line of code to your
wp-config.php file: define( 'WP_DEBUG', true );. With debugging enabled, you’ll be able to see error messages and other debug information in your browser.
- Use Debugging Tools: In addition to the WordPress debugging feature, you can use debugging tools such as the Chrome DevTools to inspect the HTML, CSS, and JavaScript of your plugin’s pages.
- Fix Errors and Warnings: When you’re testing and debugging your plugin, you may encounter errors and warnings. You’ll want to fix these as soon as possible, as they can impact the functionality and performance of your plugin.
- Test on Different Environment: To ensure that your plugin works in different environments, you’ll want to test it on different platforms, browsers, and devices. You may also want to test it on different versions of WordPress and PHP.
By following these steps, you’ll have a well-tested and debugged advanced WordPress plugin. Remember to be thorough in your testing, and make sure that your plugin works as expected in all environments.
Sharing Your Plugin
Finally, you can share your plugin with the world by submitting it to the WordPress plugin repository or distributing it through your own website.
Sharing your new WordPress plugin with the world is an exciting step in the plugin development process. Here’s how to do it:
- Package Your Plugin: Before you share your plugin, you’ll want to package it into a .zip file. This file should include all of the plugin’s code, documentation, and any other relevant files.
- Submit Your Plugin to the WordPress Repository: The WordPress repository is the official marketplace for WordPress plugins, and it’s where you’ll want to share your plugin. To submit your plugin to the repository, you’ll need to create an account, and then follow the instructions for submitting a plugin.
- Provide Detailed Documentation: Your plugin should come with detailed documentation that explains how to use it, how to install it, and how to troubleshoot any issues that may arise. Make sure your documentation is well-written, easy to understand, and includes screenshots and examples.
- Share on Social Media and Other Channels: In addition to submitting your plugin to the WordPress repository, you can share your plugin on social media and other channels. This will help to promote your plugin and reach a wider audience.
- Offer Support: Once your plugin is live, you’ll want to offer support to users who may have questions or need help with your plugin. You can do this through a support forum, email, or other channels.
By following these steps, you’ll have shared your WordPress plugin with the world, and you’ll be well on your way to making an impact with your plugin. Good luck, and happy coding
